A little last minute change to my DIY outfit for the wedding I went to in Sydney on the weekend. Ended up layering a watermelon DIY floor length silk skirt (with a big side split) over a black elasticated bodycon dress with cut outs in the back. I sewed a black silk waistband directly onto the skirt while it was on to make it look more streamlined. The skirt had such a beautiful flow to it when I walked and was so nice to wear. The candy store tiled walls of the bathrooms in The Ivy made a perfect (albeit random) backdrop for a few last minute pics.
Shop my closet here.
|
|
---|
Showing posts with label Maxi Dresses. Show all posts
DIY Side Split Wrapped Bodice Dress - The Tutorial
Thanks for all your lovely feedback on my DIY side split dress. This is the tutorial a lot of you have been asking for - the side split dress with wrapped bodice. It's so incredibly easy.
The first thing to do is to make a maxi skirt using the tutorial I gave here. Create the split by only sewing the top 30cm (or so) of the long seam together. To make the bodice you will need around 2m of fabric - preferably silk, with a width of between 50cm and 1m. In this tutorial I have a crop top on (admittedly not very sexy at all) but when you make yours you won't be wearing a top of any sort underneath.
Here goes!
For those of you concerned about busting out of the dress, if you wrap tightly enough and stitch down properly you should be able to do a whole night of dancing without any trouble. Women in South East Asia have been wearing saris for thousands of years using techniques like this so I promise you'll be fine. Be sure to have a pair of scissors on your bedside table for when you get home - and cut the stitched thread and not the fabric.
I've made another one for the wedding I am going to but I still can't decide which to wear. I'll be adding a few little extra details on the day which I can't wait to show you. Do you know what the best thing is about this dress? Once you've finished wearing it you can unwrap the fabric and use it for something else. You can even unpick the maxi skirt and use that too! That's what I'll be doing once I have worn these dresses... Talk about recession chic.
The first thing to do is to make a maxi skirt using the tutorial I gave here. Create the split by only sewing the top 30cm (or so) of the long seam together. To make the bodice you will need around 2m of fabric - preferably silk, with a width of between 50cm and 1m. In this tutorial I have a crop top on (admittedly not very sexy at all) but when you make yours you won't be wearing a top of any sort underneath.
Here goes!
1. Place the strip of fabric over your shoulder.
2. Tuck one end of the fabric into the maxi skirt.
3.Twist and tighten the fabric over your shoulder, making sure to cover your breast properly.
4. Still twisting, bring the fabric around behind your back.
5. Bring the fabric across the front covering your other breast.
6. Bring the fabric around tightly behind your back again.
7. Keep wrapping tightly until you have run out of fabric. When this happens tuck the end into the wrapped fabric and stitch down.
You're done!
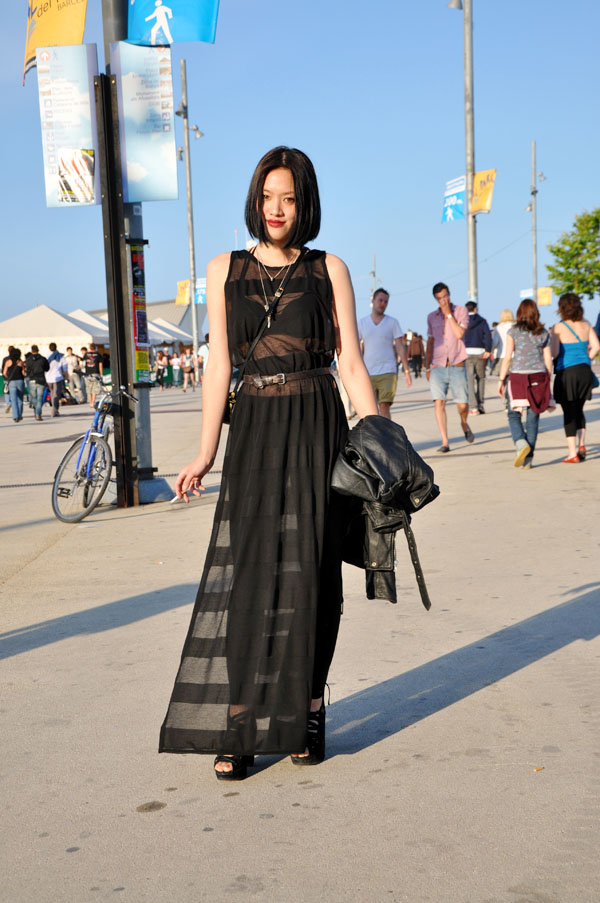
This is the dress without the crop top on - I have done it a bit tidier here too.
It may take you a few tries to get the wrapping and gathering exactly as you like it - but just play around with it until it suits your style and your frame. Make sure you cover the top of the waistband of the skirt with the wrapped fabric for a more streamlined look - you can stitch these together if you want but I didn't bother. You can even throw a belt or sash around the waist too. How nice is the side view and the back with the twisted fabric? For those of you concerned about busting out of the dress, if you wrap tightly enough and stitch down properly you should be able to do a whole night of dancing without any trouble. Women in South East Asia have been wearing saris for thousands of years using techniques like this so I promise you'll be fine. Be sure to have a pair of scissors on your bedside table for when you get home - and cut the stitched thread and not the fabric.
I've made another one for the wedding I am going to but I still can't decide which to wear. I'll be adding a few little extra details on the day which I can't wait to show you. Do you know what the best thing is about this dress? Once you've finished wearing it you can unwrap the fabric and use it for something else. You can even unpick the maxi skirt and use that too! That's what I'll be doing once I have worn these dresses... Talk about recession chic.
DIY Side Split Dress
Have been doing a lot of research on what style of bodice to do for my side split dress - after getting some great feedback from you guys this week on the asymmetric style I made last weekend (so helpful, thanks!). This twisted cut out style is also so gorgeous... and DIYable? Watch this space...
Elle UK
Elle UK
DIY Maxi to Mini Dress Technique
This gorgeous blogger from Dirty Hair Halo has used a DIY technique on this dress that I've found really useful in the past. The dress in these photos used to be a moo moo - long and shapeless. To update the dress and make it really cute, she cut off the dress short and then re-sewed the intricate hem back on the dress so as not to lose any of the detail. This is a really good DIY technique for shortening dresses with pretty embroidered or ruffled hems.
Images: Dirty Hair Halo
DIY Inspiration - Mini / Maxi Dress
Party at the front / business at the back? Since I posted here about the super cool update Jazzi McG did to her maxi dress, I have been obsessed with this hem style - mini at the front and maxi at the back. You would probably feel like princess with a long train (but not as long as Princess Di's), in a good way. Apparently Aussie designers Aje thought of it a while ago... Such an easy way to update your maxi dress.
DIY Tie dye maxi dress
Am going to work out how to DIY this even if its kills me! I think I'll need: Lots of white fabric + assorted colours for tie dying + large silver or bronze ring + time.
Image: Knight Cat
Image: Knight Cat
DIY Altered Maxi Dress
Love the way Jazzi McG has dealt with being too short for most maxi dresses by cutting this one into a mini dress at the front, with a long train at the back. When the maxis get old (which may be soon given how prolific they are at the moment, you can barely go out for lunch with your friends anymore without having to call each one beforehand to make sure you'll not all be rocking clashing printed maxis at the same time!!) this is a definite maxi update posibility.
You'll need:
You'll need:
- maxi
- scissors
- confidence like Jazzi
Subscribe to:
Posts (Atom)